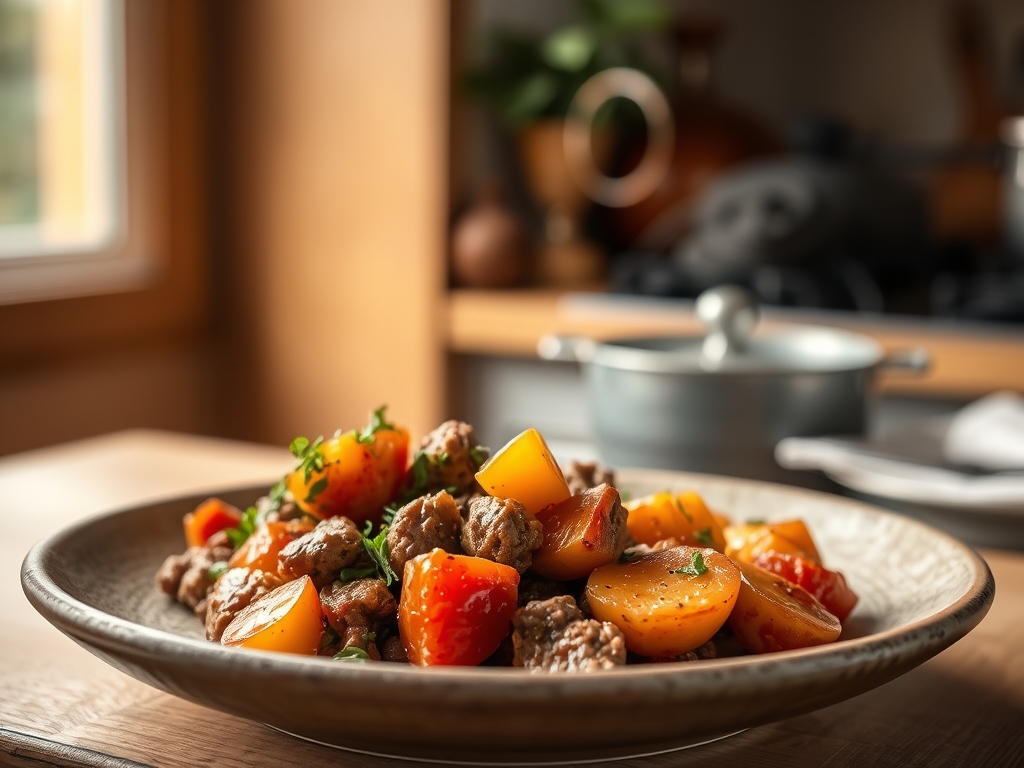

Imagine a kitchen filled with the heady, aromatic steam of slow-braised aromatics; the kind of scent that wraps around you like a cashmere blanket on a rainy Tuesday. We are diving deep into the world of silverside beef recipes, a cut often misunderstood as the tough underdog of the butcher block. This lean, muscular section from the hindquarter is a masterclass in texture transformation. When treated with the respect of a low-and-slow braise, those tight protein fibers surrender into buttery, fork-tender ribbons. It is not just dinner; it is a scientific triumph of collagen conversion and flavor layering. We are going to unlock the secrets of this affordable luxury, ensuring your roast is never dry, never grey, and always the star of the table.
The Gathers:
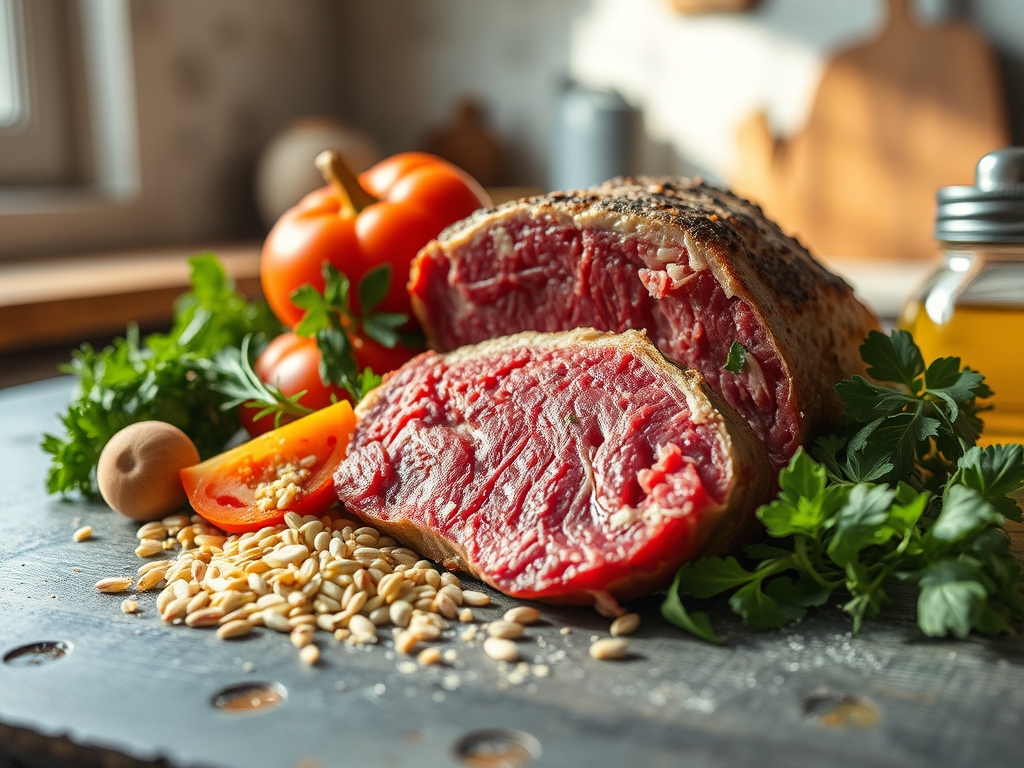
To achieve the ultimate silverside beef recipes, your mise-en-place must be precise. We start with a 1.5kg silverside joint, characterized by its signature "silver" connective tissue, which we will partially render to add body to our sauce. You will need a heavy-bottomed skillet or a cast-iron Dutch oven to ensure even heat distribution. Gather high-quality sea salt, cracked black peppercorns, and four cloves of garlic. For the braising liquid, prepare 500ml of bone broth; this provides the gelatinous base needed for a viscous gravy.
Our aromatic base includes a classic mirepoix: carrots, celery, and onions, all diced to a uniform 1cm cube using a sharp chef knife to ensure they soften at the same rate. Add two sprigs of rosemary and three bay leaves to infuse the liquid with woodsy notes. For a piquant kick, keep a bottle of Worcestershire sauce and a tablespoon of tomato paste nearby.
Smart Substitutions:
If you are looking to pivot, swap the bone broth for a dry red wine like a Malbec to add acidity and depth. For those avoiding nightshades, replace the tomato paste with a teaspoon of balsamic glaze. If you lack fresh herbs, a dried bouquet garni works, but remember that dried herbs are more concentrated; use only one-third of the fresh volume to avoid an overpowering medicinal flavor.
The Clock
Efficiency in the kitchen is about the Chef's Flow. This is the art of overlapping tasks so that no heat is wasted.
- Prep Time: 20 minutes. This includes the "tempering" phase where the beef sits at room temperature to ensure even heat penetration.
- Active Cooking: 25 minutes. This covers the high-heat searing and the initial vegetable sauté.
- The Long Game: 3 to 4 hours of passive braising.
- The Rest: 20 minutes. Do not skip this; it is the most critical phase for moisture retention.
Total time is roughly 4.5 hours. While the beef is in the oven, use that window to prepare your sides or, better yet, enjoy a glass of that Malbec.
The Masterclass
1. The Temper and Sear
Pat the beef bone-dry with paper towels. Moisture is the enemy of the Maillard reaction. Season aggressively with salt and pepper. Heat your heavy-bottomed skillet until the oil reaches its smoke point, then sear the beef on all sides using tongs until a deep, mahogany crust forms.
Pro Tip: This browning is not just for color; it creates hundreds of new flavor compounds through enzymatic browning. If the meat is wet, it will steam rather than sear, leaving you with a grey, bland exterior.
2. The Aromatic Foundation
Remove the beef and set it aside on a warm plate. Lower the heat and add your mirepoix to the residual fat. Use a wooden spoon to scrape up the "fond"—those caramelized bits stuck to the bottom. Add the tomato paste and cook until it turns a rusty brick red.
Pro Tip: This process, known as pincage, mellows the acidity of the tomato and intensifies the natural sugars in the vegetables, providing a complex base for your silverside beef recipes.
3. The Deglaze and Submerge
Pour in a splash of broth or wine to deglaze the pan, then return the beef to the pot. Add the remaining liquid until it reaches halfway up the side of the meat. Toss in your herbs and garlic cloves.
Pro Tip: Braising is a moist-heat cooking method. By only partially submerging the meat, you allow the top to benefit from convection while the bottom undergoes a slow hydrolysis of collagen into gelatin.
4. The Low and Slow Descent
Cover the pot with a tight-fitting lid or foil to prevent evaporation. Place it in a preheated oven at 150C (300F). Check the liquid levels every hour; if it looks low, add a splash of water to maintain the volume.
Pro Tip: Keeping the temperature low prevents the muscle fibers from tightening too quickly. If you boil the meat, the proteins will squeeze out all their moisture, resulting in a "stringy" texture.
5. The Rest and Recovery
Once the internal temperature reaches 90C (195F) and the meat is "probe-tender," remove it from the liquid. Wrap it loosely in foil and let it rest on a cutting board for at least 20 minutes.
Pro Tip: This allows for thermal carryover, where the internal temperature continues to rise slightly. More importantly, it allows the cell structures to reabsorb the juices, ensuring every slice is succulent.
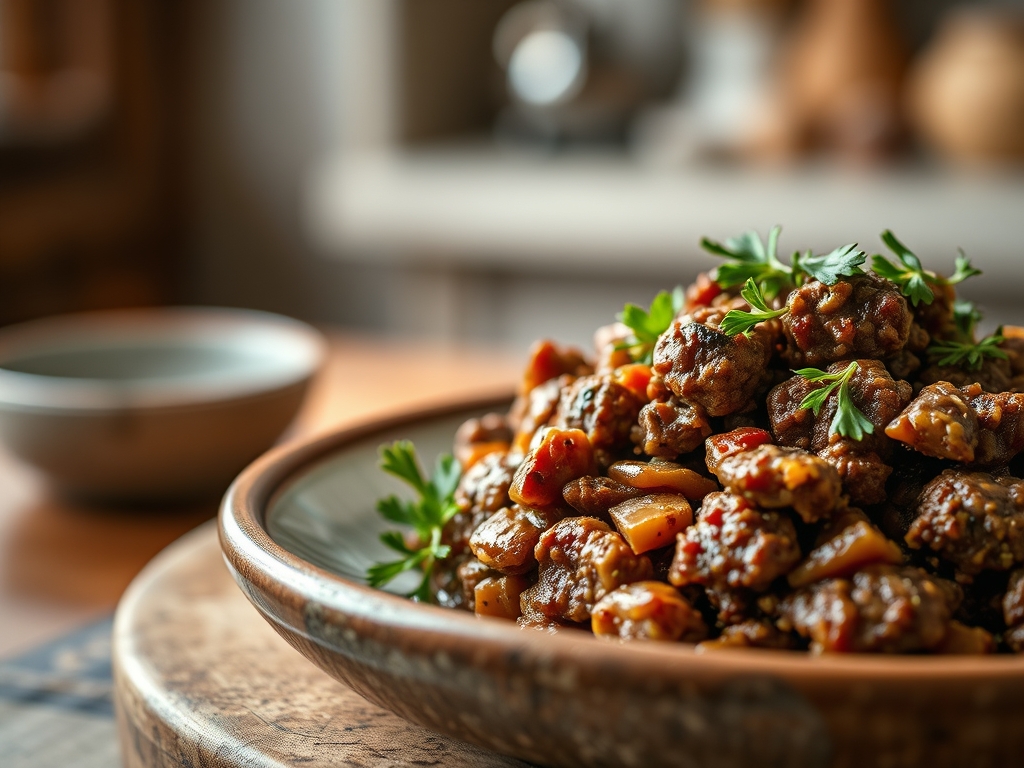
6. The Sauce Reduction
While the meat rests, strain the braising liquid into a saucier. Simmer over medium-high heat until the liquid reduces by half and coats the back of a spoon. Use a microplane to zest a hint of lemon over the sauce at the very end for a bright finish.
Pro Tip: This reduction concentrates the solutes, creating a viscous sauce without the need for heavy flour thickeners, keeping the flavor profile clean and intense.
The Deep Dive
Macro Nutrition:
Silverside is a nutritional powerhouse. A 100g serving typically contains 26g of protein and only 5g of fat, making it one of the leanest beef options. It is rich in Vitamin B12 and Zinc, essential for metabolic health.
Dietary Swaps:
- Vegan: While you cannot "silverside" a vegetable, you can use this exact braising technique for whole-head cauliflower or thick-cut "steaks" of celery root.
- Keto: This recipe is naturally keto-friendly. Just ensure your broth has no added sugars.
- GF: Ensure your Worcestershire sauce is a certified gluten-free brand.
The Fix-It:
- Tough Meat: If it is still chewy, it simply hasn't cooked long enough. Put it back in. Collagen takes time to melt.
- Salty Sauce: If the reduction is too salty, add a peeled potato to the liquid for ten minutes to absorb excess sodium, or balance with a splash of cream.
- Grey Exterior: This happens if the pan wasn't hot enough during the sear. Next time, wait for the oil to shimmer.
Meal Prep:
Silverside beef recipes are actually better the next day. To reheat, slice the cold beef and submerge the slices in the leftover gravy. Heat gently in a pan; the liquid will prevent the meat from drying out, maintaining that "day-one" quality.
The Wrap-Up
Mastering silverside beef recipes is like learning a secret handshake in the culinary world. It proves that you don't need the most expensive cut to produce a five-star meal; you just need a little bit of science and a lot of patience. This dish is hearty, sophisticated, and incredibly rewarding. Now, grab your tongs, fire up that stove, and turn that humble joint into a masterpiece that will have everyone asking for seconds.
The Kitchen Table
How do I stop silverside beef from being dry?
The key is low temperatures and a long resting period. Cooking the beef too fast causes muscle fibers to contract and expel moisture. Always rest the meat for 20 minutes before slicing to allow juices to redistribute.
Can I cook silverside beef in a slow cooker?
Yes. Follow the searing and deglazing steps first to develop flavor. Then, cook on "Low" for 6 to 8 hours. The gentle, consistent heat of a slow cooker is perfect for breaking down the tough connective tissues.
What is the "silver" on silverside beef?
It is a layer of tough connective tissue called elastin. Unlike collagen, it does not break down during cooking. You should trim the thickest parts off, but leave a thin layer to help the meat hold its shape.
Why should I sear the meat before braising?
Searing creates the Maillard reaction, which develops deep, complex flavors that cannot be achieved through boiling or steaming. This "crust" seasons the entire braising liquid, resulting in a much richer and more savory sauce.